
If your brand’s content features discontinued products, outdated ingredients, or tired trends, it’s time to update those old recipes.
Remember zoodles? Yeah, they feel like a dim memory to me, too.
But 10 years ago, spiralized zucchini (“zoodles”) and other vegetables were everywhere as a low-carb, keto-friendly alternative to pasta.
Spiralizers were a must-have tool (now occupying thrift store shelves and filling Facebook Marketplace listings).
There were dozens of cookbooks devoted to spiralizing. And for a time, you could find spiralized vegetables in produce departments, but they’ve mostly disappeared. Green Giant still offers frozen versions, but that’s about it.
At the time, at least two of my clients deemed spiralizing a trend worth including, and it was popular enough that it made sense. The recipes were good, but now they languish in a digital limbo.
When a Food Trend Makes Sense for Your Brand (and When It Doesn’t) →
Recipes do indeed help build a robust evergreen content library that, well-tended, can keep customers engaged and boost a brand’s SEO.
But old recipes featuring outdated ingredients, phased-out products, less-than-great images, and trends that have waned just kind of … sit there.
They don’t have to languish. When you update old recipes strategically, even a light refresh can yield welcome dividends. That’s the beauty of content in a digital setting: You can always update it.
Recipes do indeed help build a robust evergreen content library that, well-tended, can keep customers engaged and boost a brand’s SEO. But old recipes featuring outdated ingredients, phased-out products, less-than-great images, and trends that have waned just kind of … sit there.
How Updating Old Recipes Pays Off
A recipe that’s already on your site has a head start on a brand-new post. It’s indexed, it may have earned links, and it has a search history to build on. A refresh capitalizes on that equity instead of starting from scratch:
- Better search performance. Search engines favor content that’s genuinely helpful and current. A recipe with fresh tips, working links, accurate product references, and strong images gives them more reason to send readers your way.
- More value for your customers. A recipe that calls for a retired product they can’t buy anymore fails them when they’re ready to shop. A dated photo undersells food that’s really good.
- A smaller investment. The heavy lifting (concept, development, testing) is already done. Updating copy and, if needed, reshooting costs a fraction of developing a new recipe from scratch.
Start With Recipes Already Getting Traffic
If your brand has dozens or even hundreds of recipes, dig into the data. In Google Search Console, click Performance in the left menu. Use the Date filter’s Compare tab to compare the last three months year over year, turn on Average position, then scroll down and click the Pages tab to see how each recipe is performing now versus a year ago. Look for:
- Recipes that still get seen but not clicked. Impressions are steady, but clicks have dropped (or, frankly, never matched impressions). A new title, description, or image can help win readers’ attention.
- Recipes that are almost there. An average position of roughly 8 to 20 means the page sits at the bottom of page one or on page two. A meaningful refresh can move it up.
- Your most popular recipes with your weakest photos. These get the most eyeballs, so better images will pay off fastest.
- Recipes built around discontinued products. These are actively frustrating customers right now.
Pick five to 10 to start. That’s a manageable project, and it gives you a clear before-and-after to measure.
Refresh, Redevelop, or Retire?
Not every old recipe deserves the same treatment. Sort your list into three buckets:
- Refresh. The recipe still works and still fits your brand, but it needs updated copy, links, tips, and possibly new photos (because the old images look really dated or include products with old packaging).
- Redevelop. The recipe features a key product has been discontinued or it was built around a trend that’s passed. The idea is sound, but the recipe needs to be reworked and, if needed, retested. Sometimes the update is a smarter ingredient choice. For example, here’s why I often reach for canned pumpkin instead of fresh.
- Retire. The recipe is thin, duplicates something better, or no longer fits your brand. Don’t just delete it; set up a 301 redirect to the closest relevant page so you keep the search value it earned.
I made the same call on my own site: a post about an older plant-based roundup project was too thin to keep, so I redirected it to a portfolio page that showcases my work for the client overall.
How to Update Old Recipes: The Content Checklist
It’s common to push new content live, promote it, and then forget about it. An old recipe that’s been sitting on a site for five years (or 10 or longer) may feel irrelevant to a current reader, even if there’s genuinely good stuff there.
Start with these updates:
- Fix the links. Repair or remove broken links. Add internal links to newer content and link from newer content back to your old gems.
- Update product references. Products get phased out over time. Is there a comparable product in your brand’s current line that works, or can the recipe call for a generic version? If there’s no easy swap, it may be time to retire (and redirect) or redevelop the recipe.
- Retest it. Products get reformulated and package sizes change. A recipe that calls for “1 package” of something may not work the way it used to.
- Lose dated trend references. Small edits may be all you need to make a recipe feel more evergreen.
- Add what today’s cooks want. New tips, substitutions, make-ahead notes, dietary swaps, or, say, an air fryer method give readers (and search engines) more reason to visit.
- Update the recipe card. Refresh prep and cook times, servings, nutrition, and images. Add video if you have it. This is the structured information search engines read to display your recipe in results.
- Double-check SEO basics. Would a new keyphrase or related keyphrase work better than your initial choice? Update the meta title and meta description if needed. (But keep the original URL.) Make sure every image has alt text that accurately describes it.
- Change the “updated” date only for real updates. A new date on unchanged content doesn’t fool readers or search engines.
Should Your Brand Chase the Birria Trend? Here’s How One Client Decided →
Give Old Recipes a New Look
How do the recipe images themselves look? Recipes shot by a founder in a home kitchen might have sufficed in a brand’s early days, but five, even 10 years later, they won’t reflect how that brand has evolved.
Sometimes, even when the image is fine, it features outdated packaging (this is why I typically recommend brands get some variations without packaging). The product itself remains the same, but the label and/or logo isn’t what shoppers will see on store shelves.
Does Your Brand Really Need Professional Food Photography?
If you’ve got older recipes that are perfectly fine (even stellar) but don’t look good enough to promote in social media or a newsletter, a reshoot is a smart investment. It’s an opportunity to make sure the food looks as good as it tastes, and to get a variety of visuals for all your needs: hero shots, vertical images for Instagram, process shots, and short video.
Put Refreshed Recipes Back to Work
Once you’ve updated those old recipes, you have fresh content to promote, without developing anything new:
- Newsletter: a “from the archives, updated” feature is an easy recurring segment.
- Social media: before-and-after images make a strong post on their own.
- Pinterest: new images mean new pins, pointing to a page that already exists.
- Retail and e-commerce partners: updated photos and recipes can refresh product pages and retailer listings.
Then measure it. Note the date you updated each recipe and check its clicks and average position in the Search Console eight to 12 weeks later.
Not sure if your old recipes fit your brand’s vibe today? The free Content Kitchen Recipe Brief helps you evaluate old (and new) content in less than 10 minutes →
Before & After: How to Update Old Recipes Like This Zoodle-Era Bolognese
I adapted and shot this ground chicken bolognese for PARADE Magazine in 2018, adapted from fitness guru Bob Harper’s 2017 book The Super Carb Diet. He called for serving it over zoodles, which were enormously popular at the time. The sauce still holds up, but the spiralized zucchini feels dated now.
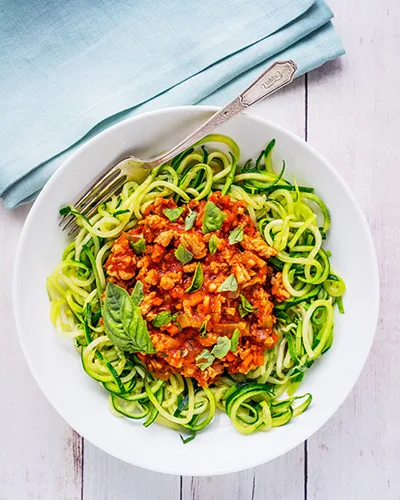
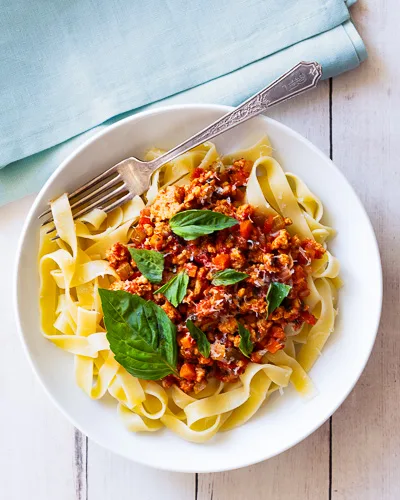
Here’s what changed:
- Pasta is now the default, with zoodles (or spaghetti squash) as alternatives.
- I went up on the fresh herbs in the sauce because more herbs = more flavor.
- The sauce simmers a bit longer for deeper flavor.
- I’ve added make-ahead tips.
- An updated image to reflect the changes in the recipe.
I have to admit, I miss the visual contrast of the red sauce and the green zoodles, but pasta is a more timeless fit.
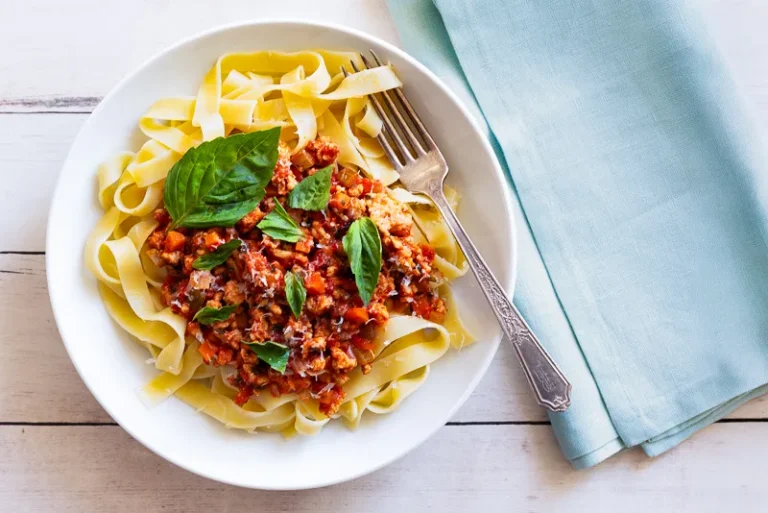
Weeknight Chicken Bolognese
Equipment
- 1 large saucepan
- 1 chef's knife
- 1 large skillet
Ingredients
- Kosher salt, to taste
- 12 ounces long pasta (such as tagliatelle or pappardelle, regular or gluten-free)
- 1 tablespoon extra-virgin olive oil
- 1 medium carrot, peeled and finely chopped
- 1 stalk celery, finely chopped
- ½ onion, finely chopped
- 2 cloves garlic, minced
- 1 pound ground chicken (or turkey)
- 1 (15-oz) can crushed tomatoes
- 1 tablespoon minced fresh basil, plus extra for garnish
- 2 teaspoons minced fresh oregano
- Freshly ground black pepper, to taste
- Parmigiano-Reggiano cheese, finely grated (optional, for garnish)
Instructions
- Bring a large pot of salted water to a boil. Cook the pasta according to package directions until al dente.
- Meanwhile, heat the oil ina large skillet over medium. Add the carrot, celery, onion, and garlic. Cook 5 minutes or until tender, stirring occasionally. Add the chicken and cook 4-5 minutes or until the chicken is browned, stirring to crumble.
- Stir in the tomatoes, basil, and oregano. Simmer 15 minutes.
- When the pasta is done, drain it, reserving ½ cup pasta water. If the sauce is too thick for your liking, stir in reserved pasta water a couple of tablespoons at a time to adjust the consistency.
- Divide the pasta among 4 plates or bowls. Top evenly with the sauce. Garnish with cheese, if desired, and additional torn basil.